If you work with stainless steel, you already know one thing: the raw material is only half the story. The real performance comes from the surface treatment.
Choose the wrong method, and you risk tea staining, pitting corrosion, dull finishes, and hygiene problems. Choose the right one, and you get long‑lasting shine, easy-to-clean surfaces, and optimized corrosion resistance that stands up in tough environments.
That’s exactly what this stainless steel surface treatment methods guide is about.
You’re going to see how different stainless steel surface finishing techniques—from pickling and passivation to electropolishing, mechanical polishing, brushed finishes, and mirror polish—actually work in practice. You’ll learn when to use post-weld surface treatment, how to meet ASTM A380 requirements, and which methods deliver the best balance of appearance, durability, and cost for your application.
Whether you’re specifying finishes for architecture, optimizing hygiene in food or pharma, or restoring performance after fabrication, this guide will show you exactly how to choose and apply the right stainless steel surface treatment—backed by real industry know‑how from Xinye Steel.
1. Understanding Stainless Steel Surface Treatment
When people search for a stainless steel surface treatment methods guide, they’re usually trying to solve very practical problems:
- Why is my stainless steel rusting or tea-staining?
- Why do welds look discolored and rough?
- Which stainless steel surface finishing techniques will give me the right look and the right corrosion resistance for my project?
In our experience, users want three things from any serious guide to stainless steel surface treatment methods:
- Clarity – what each method (mechanical, chemical, electrochemical) actually does to the metal.
- Relevant choices – which process to use for specific grades like 304, 316, duplex, and for specific environments (food, pharma, marine, outdoors).
- Real-world outcomes – how to avoid rust, contamination, hygiene failures, and ugly surfaces that clients notice immediately.
Untreated or poorly treated stainless steel develops problems fast, even in mild environments:
- Rust spots and tea staining from iron contamination and damaged passive layers.
- Weld discoloration (heat tint) and scale that weaken corrosion resistance around joints.
- Rough, hard-to-clean surfaces that trap dirt or bacteria in food, beverage, or pharmaceutical applications.
- Inconsistent appearance – patches of different gloss, visible grinding marks, or non-uniform grain.
The right stainless steel surface treatment methods directly control three critical factors:
Corrosion resistance
- Processes like pickling, passivation of stainless steel, and electropolishing stainless steel restore or enhance the chromium-rich passive layer.
- Proper treatment reduces pitting, crevice corrosion, and stress corrosion cracking, especially in grades like 304 and 316 exposed to chlorides or chemicals.
Hygiene and cleanability
- Fine mechanical polishing stainless steel, low surface roughness Ra, and electropolishing make surfaces smoother and easier to clean.
- In food and pharma, a well-finished surface helps reduce bacterial adhesion and supports compliance with FDA and EU food-contact expectations.
Appearance and design value
- Brushed finish stainless steel (No. 4, satin, hairline) gives a controlled grain and hides fingerprints on façades, elevators, and handrails.
- Mirror polish stainless steel (No. 8 mirror finish stainless steel) delivers high-end reflective aesthetics for interiors, signage, and decorative elements.
- Consistent finishing across all parts reinforces brand image and reduces rework.
We build our processes and recommendations around these realities: if the surface isn’t treated correctly, stainless steel won’t perform as “stainless.” Surface treatment is not decoration—it’s a core part of corrosion resistance enhancement, hygiene, and long-term appearance.
2. Basics of Stainless Steel Surfaces
When we talk about any stainless steel surface treatment methods guide, everything starts with the base surface itself. If the base isn’t right, no polishing, pickling, or electropolishing will save it.
Passive Chromium Oxide Layer & Self-Healing
Stainless steel gets its corrosion resistance from a very thin, invisible chromium oxide film on the surface.
Key points:
- This passive layer forms naturally when chromium in the steel reacts with oxygen.
- It’s self‑healing: if it’s lightly damaged, it can rebuild itself in the presence of oxygen and moisture.
- A clean, uniform passive layer is the foundation for all stainless steel surface finishing techniques.
If the surface is dirty, contaminated, or covered in scale, this passive layer can’t form properly – and corrosion starts.
How Fabrication Damages the Passive Layer
Common fabrication steps like welding, cutting, grinding, and forming can all damage stainless surfaces:
- Welding: creates heat tint, scale, and areas with lower chromium at the surface.
- Cutting & grinding: smear metal, embed abrasive particles, or transfer carbon steel contamination.
- Forming & bending: can create micro-cracks and stressed areas where corrosion initiates.
This is why stainless steel fabrication cleaning is not optional if you want long-term performance.
Typical Surface Defects After Fabrication
Right after fabrication, you’ll often see:
- Heat tint and scale along welds and heat-affected zones.
- Iron contamination from carbon steel tools, wire brushes, or blasting media.
- Roughness and scratches from aggressive grinding or poor mechanical polishing.
All of these weaken the passive layer, raise the surface roughness Ra, and increase the risk of pitting, tea staining, and rust.
Why “Stainless” Still Needs Surface Finishing
Stainless steel is “stain less,” not “stain proof.”
Without proper surface preparation and finishing:
- Corrosion resistance drops sharply, especially in marine, chemical, or outdoor exposure.
- Hygiene suffers – rough or contaminated surfaces trap product, bacteria, and dirt.
- The appearance degrades fast: discoloration, rust spots, and difficult-to-clean fingerprints.
That’s why in our projects we always combine the right stainless steel surface treatment methods with the right base material. For example, when we supply patterned and decorative sheet like our stainless steel embossed sheets with lizard-print texture, we make sure the base finish and passive layer are properly controlled so the product looks good and stays corrosion-resistant in real-world use:
stainless steel embossed sheets – lizard print
3. Types of Stainless Steel Surface Treatment Methods
When we talk about a real stainless steel surface treatment methods guide, we’re basically choosing between four main routes: mechanical, chemical, electrochemical, and specialized finishes. Each has a clear job, a cost level, and a best-fit industry.
Mechanical surface treatment methods overview
Mechanical treatments change the surface by force and abrasion, not by chemistry. Typical methods:
- Grinding & mechanical polishing – use abrasives (grits) to control surface roughness (Ra) and get brushed, satin, hairline, or mirror effects.
- Abrasive blasting – glass bead blasting, shot blasting, or sandblasting to create matte, uniform surfaces and hide fabrication marks. For a good example of controlled blasted/matte finishes, look at products like this sandblasted stainless steel plate with a matte finish.
Best for: visual appearance, grain direction, smoothing welds and edges, and preparing parts before chemical or electrochemical treatment.
Chemical surface treatment methods overview
Chemical methods use acids or cleaners to react with the surface:
- Cleaning & degreasing – remove oils, ink, adhesive, and shop dirt before any other step.
- Descaling & pickling stainless steel – aggressive acids remove heat tint, scale, and oxides after welding or hot work.
- Passivation of stainless steel – nitric or citric acid removes free iron and boosts the chromium-rich passive layer for better corrosion resistance.
Best for: restoring corrosion performance after fabrication, heat tint removal, and preparing high-performance 304, 316, or duplex stainless parts for service.
Electrochemical surface treatment methods overview
Electrochemical methods use electric current + chemistry to fine-tune the surface:
- Electropolishing stainless steel – controlled metal removal at the micro level, lowering Ra, improving cleanability, and giving a bright, smooth finish.
- Electrochemical weld cleaning – fast removal of weld discoloration and heat tint on-site without heavy pickling.
Best for: hygienic stainless steel finishes (food, pharma, biotech), critical corrosion resistance, and smoothing complex shapes where mechanical polishing is hard or expensive.
Specialized finishes and treatments
Beyond the basics, we also use coatings and texture to hit specific design or performance targets:
- Coatings – clear coats, paints, or functional layers for extra corrosion resistance or reduced fingerprinting.
- Patterning & embossing – textured and embossed stainless steel sheets (like diamond or decorative etched/embossed plates) that improve appearance, hide scratches, and add slip resistance.
- Coloring – chemical or physical coloring for architectural or branding needs.
Best for: architectural façades, elevators, signage, decorative panels, and any project where appearance and touch feel are as important as durability.
Matching methods to industries and use cases
In real projects, we nearly always combine these stainless steel surface finishing techniques:
- Food & beverage / pharma / biotech: fine mechanical polish + pickling + passivation, often finished with electropolishing.
- Architecture & interiors: mechanical polishing (No. 4 brushed, hairline, or No. 8 mirror), blasting, or patterned/embossed sheets.
- Chemical & process industries: heavy pickling + passivation, plus coatings where corrosion risk is high; post-weld treatments are non‑negotiable.
- General fabrication: mechanical finishes for looks and safety, with chemical or electrochemical steps whenever corrosion resistance is critical.
Choose the mix based on environment, hygiene demands, and budget—not just what’s easiest in the shop.
4. Mechanical Stainless Steel Surface Treatment Methods
Mechanical stainless steel surface treatment methods are your first line when you want to “see and feel” the finish. They shape the look, texture, and even the cleanability of the metal before you move to any chemical or electrochemical steps.
Grinding and Polishing Stainless Steel
Grinding and polishing stainless steel is about controlling grit sequence and surface roughness (Ra) so the finish is consistent across every panel or part.
- Start with coarse grit (60–120) to remove welds and defects
- Move through medium grit (180–240) to refine scratches
- Finish with fine grit (320–600+) for smooth, low‑Ra surfaces
Always keep the grinding direction and pressure consistent. That’s how we get uniform finishes on our own polished stainless steel sheet ranges, such as this high-quality mirror finish steel plate.
Mechanical Polishing for Different Finishes
With mechanical polishing, we can dial in very different stainless steel surface finishing techniques from the same grade (304, 316, duplex, etc.):
Brushed finish stainless steel (No. 4, satin, hairline)
- Linear grain made with belts around 150–320 grit
- Ideal for façades, elevators, handrails where you want a calm, directional look
- Hairline is a tighter, more continuous grain for more “premium” visual impact
Mirror polish stainless steel (No. 8 mirror finish)
- Multi‑step polish up to very fine abrasive, then compound buffing
- Results in near specular reflection and very low Ra
- Perfect for high‑end interiors, signage, and feature walls
Buffing and coloring
- Final buffing with compounds lifts gloss and eliminates micro-scratches
- You get high‑luster surfaces that look deeper and “richer” than a basic polish
We use this same approach on our polished stainless steel sheet lines to keep color, gloss, and grain consistent lot to lot.
Abrasive Blasting Stainless Steel
Abrasive blasting stainless steel lets you create even, non-directional textures that hide fingerprints and small defects.
- Glass bead blasting – smooth, satin, low-glare finish, minimal metal removal
- Shot blasting – stronger impact, useful for heavy scale removal and texture
- Sandblasting / grit blasting – more aggressive, but must be carefully controlled
Blasting changes surface roughness. Higher Ra can slightly increase corrosion risk if you don’t follow with proper cleaning and passivation, because more micro-valleys can trap contaminants.
Contamination Risks with Blasting Media
The big risk: iron contamination from the wrong abrasive or reused media. Avoid:
- Carbon steel shot or grit
- Contaminated blast cabinets shared with carbon steel
- Low-grade sand carrying chlorides or embedded particles
Always use non-contaminating media (glass bead, ceramic, clean stainless shot) and dedicated equipment for stainless steel.
When to Choose Mechanical Finishing
Mechanical vs. chemical vs. electrochemical surface treatment comes down to what you need most:
Choose mechanical finishing when you:
- Care primarily about visual finish and tactile feel
- Need defined patterns (No. 4, hairline, mirror, bead-blast)
- Must correct distortion, weld overbuild, or heavy scratches
Strengths:
- Precise control over appearance and Ra
- No acid handling, easier to manage on-site
- Works for local rework and repairs
Limits / Costs:
- Labor and time intensive for large areas
- Cannot remove all heat tint or embedded contaminants alone
- Often still needs chemical cleaning or passivation for best corrosion resistance
In practice, I treat mechanical stainless steel surface treatment methods as the design tool: they deliver the look and texture. Then chemical or electrochemical treatments come in behind them to lock in corrosion resistance and long-term performance.
5. Chemical Surface Treatment Methods for Stainless Steel
Chemical stainless steel surface treatment methods are all about cleaning, descaling, and restoring corrosion resistance without changing the basic shape of the part. I use them when I need reliable, repeatable results on welded, formed, or fabricated stainless steel components.
Stainless Steel Surface Preparation & Degreasing
Before any pickling or passivation, the surface must be perfectly clean.
Typical degreasing options:
Solvent cleaning
- Good for heavy oils, greases, markers, adhesives
- Use approved industrial solvents or wipes, then rinse
Alkaline cleaning
- Alkaline detergents or sprays to remove cutting fluids and shop dirt
- Often used in line before pickling/passivation
Detergent cleaning
- Mild cleaners for light contamination and fingerprint removal
- Always finish with a clean water rinse, no residue
Aim: remove oils, adhesives, coolants, marker inks, and shop contaminants so acids can work evenly and the final finish is consistent.
Descaling & Pickling Stainless Steel
After welding or high‑temperature processing, stainless steel often shows heat tint, scale, and oxides that must be removed.
How pickling stainless steel works:
- Uses strong acids to dissolve:
- Heat tint and welding discoloration
- Mill scale and high‑temperature oxides
- Thin layers of chromium‑depleted metal
Common pickling chemistries:
Nitric–HF (hydrofluoric) acid mixes
- Very effective on heavy scale and welds
- Used in immersion tanks or controlled spray systems
Mixed acid systems / proprietary gels
- Pickling pastes and gels for local weld treatment
- Ideal for on-site stainless steel weld discoloration removal
Localized vs. full-immersion pickling:
- Localized (pastes/gels): for weld seams, small repairs, on-site work
- Full immersion: for new fabrications, pipe spools, and complex parts needing uniform treatment
For patterned or decorative sheets, I often combine pickling with controlled finishes like sandblasted matte plates or etched plates to get both clean metal and a stable appearance; for example, a sandblasted stainless steel plate with a matte finish can be pickled first for better corrosion performance before the final texture is applied, similar to the effect you see on a sandblasted stainless steel matte plate.
Key standards to know:
- ASTM A380 – cleaning, descaling, and passivation practice for stainless
- ASTM A967 – specific requirements for chemical treatment and passivation
Passivation of Stainless Steel
Passivation is not “coating” the surface; it’s chemically optimizing the chromium oxide layer so the steel becomes more corrosion resistant.
What passivation actually does:
- Removes free iron and contamination from the surface
- Promotes a thin, dense, chromium‑rich passive film
- Improves resistance to pitting, tea staining, and general corrosion
Nitric acid vs. citric acid passivation:
Nitric acid passivation
- Traditional method, widely covered in ASTM A967
- Strong oxidizer, excellent for demanding industrial environments
- Requires strict safety and fume control
Citric acid passivation
- More environmentally friendly and easier to handle
- Very effective at iron removal when properly formulated
- Often preferred where green chemistry or tighter EHS rules apply
Key parameters you must control:
- Concentration – too weak = no effect; too strong = risk of etching
- Temperature – usually warm solutions increase reaction rate
- Exposure time – enough to form the passive layer, but not over-attack
Pickling vs. Passivation: When to Use Each
Pickling stainless steel
- Use when you see scale, heavy oxides, heat tint, or weld burn
- Removes a thin layer of metal plus oxides
- Prep step before high-end finishes like electropolishing or architectural brushing
Passivation of stainless steel
- Use on clean, oxide-free surfaces
- Restores/boosts the passive layer after machining, fabrication, blasting, or pickling
- Essential for food, pharma, marine, and chemical environments
In short:
Pickling = heavy cleaning + oxide removal
Passivation = corrosion resistance enhancement on a clean surface
Safety & Environmental Considerations
Chemical treatment is powerful, but you must respect the risks.
Ventilation & PPE:
- Use local exhaust ventilation or fume extraction for nitric/HF systems
- Always wear:
- Acid‑resistant gloves and apron
- Face shield and goggles
- Proper footwear and splash protection
Handling strong acids:
- Add acid to water, never the reverse
- Use dedicated containers, pumps, and tools for acids
- Clear emergency procedures: eye wash, showers, spill kits
Waste treatment & compliance:
- Neutralize spent solutions (typically with alkali) before disposal
- Filter solids and sludge, handle as regulated waste if required
- Follow local and international environmental rules for:
- Fluoride-bearing waste
- Heavy metal content
- pH discharge limits
Used correctly, chemical stainless steel surface treatment methods give you repeatable, spec-compliant finishes with proven performance in corrosion resistance and hygiene, without unnecessary mechanical work.
6. Electrochemical Surface Treatment Methods (Quick Guide)
Electrochemical stainless steel surface treatment methods are my go‑to when I need high hygiene, low roughness, and reliable corrosion resistance with minimal mechanical work.
Electropolishing Stainless Steel
What it is:
Electropolishing is an electrochemical process that removes a thin, controlled layer of metal from the surface, “melting off” micro-peaks and leveling the surface.
How electropolishing works (simple view):
- Part is connected as the anode in an acid electrolyte
- DC current is applied → metal dissolves preferentially from high peaks
- Surface becomes smoother, brighter, and more uniform at a micro level
Core benefits of electropolishing stainless steel:
- Lower Ra (surface roughness): Commonly 30–50% smoother vs. mechanical polish
- Deburring: Micro-burrs and sharp edges are reduced or removed
- Better corrosion resistance: Cleaner, chromium-rich surface + stronger passive layer
- Higher hygiene: Fewer crevices → easier cleaning → lower biofilm and bacteria retention
- Better appearance: Bright, reflective finish (not always full mirror, but very clean)
| Benefit | Effect on Use |
|---|---|
| Lower Ra | Less dirt/bacteria retention, easier cleaning |
| Micro-deburring | Safer, smoother handling, better flow in piping |
| Improved passivation | Higher corrosion resistance in harsh environments |
| Bright, uniform surface | Premium look for exposed stainless steel components |
Where electropolished stainless steel is standard:
- Food and beverage: piping, tanks, valves, fittings
- Pharmaceutical and biotech: high-purity systems, CIP/SIP lines
- Medical devices: implants, surgical tools, wire forms, stents
- Semiconductor and ultra-pure water: process lines, fittings
If you’re pairing electropolishing with decorative or architectural panels, a pre-polished sheet like our No. 8 mirror polished stainless steel sheet gives a consistent base finish before further treatment.
Post‑Weld Electrochemical Cleaning
What it is:
Electrochemical weld cleaning uses a small power unit and a carbon or stainless brush with an acid-based fluid to clean welds locally.
What it does well:
- Removes weld discoloration and heat tint quickly
- Cleans TIG/MIG welds without heavy grinding or full pickling baths
- Helps restore the passive layer around the weld area
- Keeps the surface geometry almost unchanged (no deep grinding marks)
Typical setup:
- Electrocleaning machine (DC or AC/DC)
- Brush or pad tool
- Mild acid or proprietary cleaning fluid
- Wipe down and rinse after treatment
When to choose electrochemical treatment:
- You need local weld discoloration removal on site (field work, large tanks, frames)
- You want to avoid aggressive pickling paste where possible
- A consistent hygienic surface is required near welds (food, pharma, biotech)
- You want less manual grinding and lower risk of over-thinning the weld
Electrochemical vs Mechanical vs Chemical
Choose electrochemical methods when you:
- Need low Ra, high cleanability, and premium corrosion resistance
- Have complex shapes where mechanical polishing can’t reach
- Need fast, localized weld cleaning without full immersion pickling
Limitations, cost, and equipment needs:
- Requires power supply + dedicated equipment
- Not ideal for very large, heavy sections if full electropolishing is needed
- Not a substitute for heavy scale removal; often used after pickling or descaling
- Higher initial cost vs. simple mechanical polishing, but:
- Better lifecycle cost in hygienic, high-corrosion, or high-purity environments
- Less ongoing maintenance and easier cleaning
In practice, I often combine methods:
- Mechanical pre-finish → pickling (if needed) → electropolishing for critical process equipment
- Welding → electrochemical weld cleaning for clean, passivated weld zones without aggressive grinding.
7. Comparing Stainless Steel Surface Treatment Methods
Side‑by‑side: Mechanical vs Chemical vs Electrochemical
Here’s how the main stainless steel surface treatment methods stack up:
| Method type | What it does best | Typical use |
|---|---|---|
| Mechanical finishing | Controls appearance, texture, and Ra; removes visible flaws | Architectural, decorative, general fabrication |
| Chemical treatment | Descaling, pickling, passivation, weld tint removal | Industrial, process, structural stainless |
| Electrochemical (EP) | Extreme smoothness, high corrosion resistance, deburring | Food, pharma, biotech, medical, high‑purity |
In practice, we often combine them: e.g. fine mechanical polish + pickling + passivation, or No. 4 brushed finish + localized weld cleaning.
Effect on Corrosion Resistance & Durability
- Mechanical finishing only
Looks good but doesn’t guarantee corrosion resistance. Grinding that’s too aggressive can open up the surface and trap contaminants. - Pickling + passivation
Strong impact on corrosion resistance by removing scale/heat tint and restoring a clean, chromium‑rich surface. Must‑have for harsh or outdoor exposure. - Electropolishing stainless steel
Delivers the most durable, corrosion‑resistant surface for a given grade because it smooths peaks and minimizes micro‑crevices.
If a customer asks for maximum life in marine or chemical environments, I’ll never rely on mechanical finishing alone.
Aesthetics & Surface Roughness (Ra)
- Brushed finish stainless steel (No. 4, hairline)
Gives a consistent linear grain, hides minor scratches, and offers a “warmer” look. Ra is moderate and depends on grit sequence. For premium visual projects, I often suggest No. 4 brushed stainless steel plates with controlled grain direction. - Mirror polish stainless steel (No. 8)
Very low Ra, high reflectivity, used for landmarks, signage, and high‑end interiors. - Bead blasting / shot blasting
Gives a matte, diffuse look; Ra can be higher than polished surfaces but visually uniform. - Electropolishing
Lowers Ra significantly without altering the macro appearance too much—often used after a fine mechanical polish.
If your priority is signature visual impact (façades, elevators, interiors), I lean to controlled mechanical grain finishes like our premium brushed plates. If hygiene or CIP cleaning is the priority, we go toward electropolishing.
Matching Methods to Stainless Grades (304, 316, 430, Duplex)
- 304 stainless steel
Good general choice for mechanical polishing, brushed finishes, bead blasting, pickling, and passivation. - 316 stainless steel
For marine, chemical, or chloride exposure, pair 316 with pickling + passivation or electropolishing for best corrosion resistance. - 430 stainless steel
Ferritic, more for indoor decorative applications; mechanical finishes dominate. Chemical treatments work but corrosion resistance is lower overall. - Duplex stainless steel
Higher strength and corrosion resistance; pickling and passivation parameters must be tuned carefully. Electropolishing is possible but needs tighter process control.
I always match finish + grade together; upgrading the finish on a poor grade rarely beats using the right grade with the right treatment.
Cost, Turnaround, and Scalability
- Mechanical finishing
- Cost: Low to medium
- Turnaround: Fast for standard No. 4 / hairline / basic polish
- Scalability: Very good for sheets, coils, and standard profiles
- Chemical treatments (pickling, passivation)
- Cost: Medium (chemicals + handling + safety)
- Turnaround: Medium, depends on tank capacity / job size
- Scalability: Excellent for batch and large industrial projects
- Electropolishing stainless steel
- Cost: Highest per m², plus equipment and fixturing
- Turnaround: Slower, more process steps and documentation
- Scalability: Good for repeat parts, less ideal for oversized structures
For high‑volume architectural panels, mechanical finishes are usually the most economic. For high‑risk process equipment, chemical and electrochemical methods justify their higher cost via reduced failures and longer life.
Choosing the Right Method for Your Project
When I help clients choose a stainless steel surface treatment method, I run through this quick checklist:
1. Environment and exposure
- Marine / coastal → 316 or duplex + pickling + passivation, consider electropolishing for critical parts.
- Chemical / process → Full pickling + passivation, sometimes coating on top.
- Food contact → Fine mechanical polish (low Ra) + passivation, or electropolishing for clean‑in‑place equipment.
- Outdoor architectural → Brushed or hairline mechanical finishes that hide everyday wear, with proper passivation of welds.
2. Regulatory and hygiene requirements
- FDA / EU food contact → Smooth, cleanable surfaces, defined Ra (often ≤0.8 µm), no dead zones; passivation or electropolishing is strongly preferred.
- Pharma / biotech → Electropolished + fully documented surface finish with validated Ra and traceable treatment parameters.
3. Budget, maintenance, and lifecycle cost
- Tight upfront budget, moderate environment → High‑quality mechanical finish + good fabrication practice.
- Long service life, difficult access, or expensive downtime → Invest in pickling + passivation or electropolishing from day one; it’s cheaper over the life of the asset.
- High‑traffic interiors (elevators, handrails) → Brushed or hairline finishes that are easy to re‑blend and maintain.
If you share the grade (304, 316, 430, duplex), environment, and visual target (brushed, mirror, matte, sanitary), I can narrow it down to one or two stainless steel surface treatment methods that fit both performance and budget.
8. Industry-Specific Stainless Steel Surface Treatment Methods Guide
Food & Beverage Processing Equipment
For food contact, I always treat stainless steel as a hygiene-critical surface, not just a structural material.
Best finishes for hygiene:
- Electropolished stainless steel (with prior pickling):
- Very low roughness (Ra ≤ 0.4–0.8 μm)
- Smooth, chrome-rich surface that resists biofilm
- Passivated stainless steel (per ASTM A967):
- Restores the passive layer, improves corrosion resistance in CIP/SIP cycles
- Fine mechanical polish (No. 4 or finer, then passivated):
- Uniform grain, no deep scratches or crevices
Why surface roughness matters:
- Rough or poorly ground welds trap food, sugars, proteins
- Bacteria attach faster on high-Ra surfaces and are harder to remove
- For hygienic design, I aim for:
- Product contact surfaces: Ra 0.4–0.8 μm (mechanical polish + electropolish or passivation)
- Non-contact frames/guards: brushed or bead-blast + passivation
If you’re designing tanks, piping, or filling lines, always specify:
- Welds fully ground and blended
- Pickling or electrochemical weld cleaning
- Final passivation or electropolishing for product-contact zones
Pharmaceutical & Biotech Applications
In pharma and biotech, stainless steel surface treatment is about high purity and documented consistency, not just appearance.
Typical high-purity finish stack:
- Fabrication → proper weld prep and grinding
- Pickling stainless steel (ASTM A380) to remove heat tint and scale
- Electropolishing stainless steel for ultra-smooth, chromium-enriched surfaces
- Final passivation if required by internal specs
This combination:
- Lowers Ra significantly
- Removes inclusions and micro-burrs
- Boosts corrosion resistance in WFI, buffer, and cleaning agents
Documentation & validation:
- Surface roughness certificates (Ra values)
- Material traceability for 304L, 316L, or duplex grades
- Passivation / electropolishing certificates referencing ASTM A380 / A967
- Weld maps and weld cleaning procedure records
If you’re supplying skids, bioreactors, or distribution loops, build these into your URS and FAT/SAT expectations from day one.
Architectural & Decorative Stainless Steel
For architectural stainless steel, the surface treatment is your “brand”—what people see and touch every day.
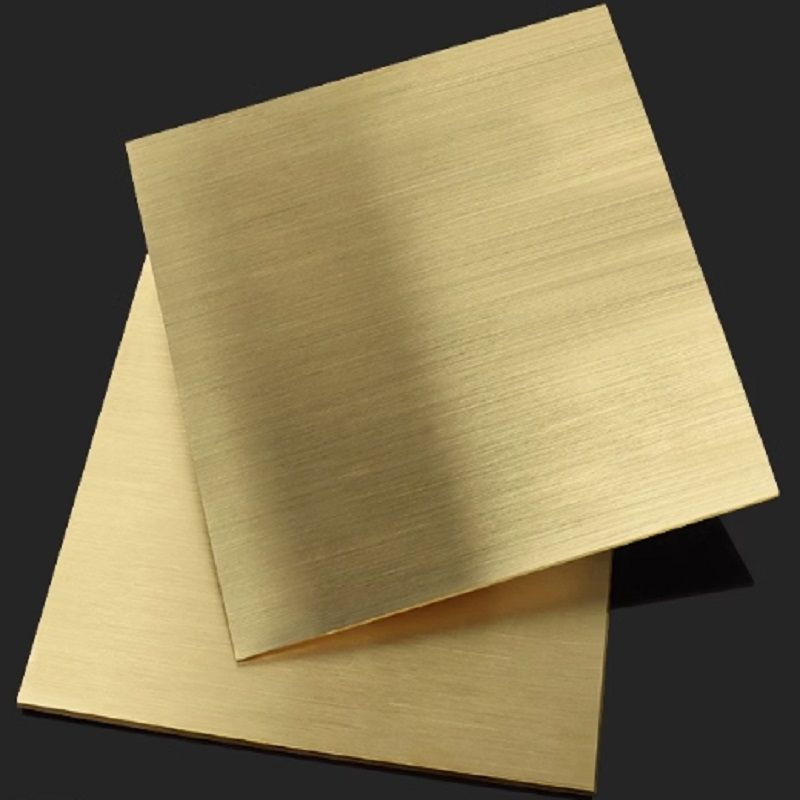
Brushed finish stainless steel (No. 4, satin, hairline):
- Ideal for façades, handrails, elevators, door panels
- Linear grain hides minor scratches and daily wear
- Good balance between aesthetics and maintenance
- For a premium façade or elevator interior, I like specifying a stable No. 4 or hairline brushed finish stainless steel plate like our premium brushed stainless steel sheets.
Mirror polish stainless steel (No. 8):
- Used for high-end interiors, signage, landmark features
- Highly reflective, “mirror” appearance
- Visually enlarges narrow lobbies or corridors
Glare, fingerprints & maintenance:
- Mirror finish (No. 8):
- Shows fingerprints, smears, and dust quickly
- Needs regular cleaning with non-abrasive agents
- Brushed / hairline finishes:
- More forgiving outdoors and in high-traffic areas
- Better for handrails, public transport, and façades
For decorative projects, I always match:
- Finish type to light conditions (sun vs interior lighting)
- Maintenance capacity (high-end mall vs public underground station)
Chemical & Process Industries
In chemical and process plants, surface treatment is about corrosion resistance and reliability, especially for 304, 316, and duplex steels.
Corrosion resistance enhancement:
- Pickling stainless steel to remove heat tint and weld scale
- Passivation (nitric or citric acid) to rebuild a clean, chromium-rich surface
- Optional coatings or linings for extreme media (chlorides, acids, chlorinated solvents)
Typical combinations:
- Tanks, reactors, and piping:
- Weld prep → pickling (immersion or pickling paste/gel)
- Passivation for long-term corrosion performance
- High-chloride or offshore:
- Pickling + passivation + coating system where needed
Post-weld surface treatment:
- Heat tint and weld discoloration must be removed:
- Pickling pastes, gels, or immersion
- Electrochemical weld cleaning for faster, localized treatment
- Proper weld cleaning restores corrosion resistance near the weld and prevents crevice corrosion and rust bleed.
Field vs. shop treatment:
- Shop treatment (immersion pickling, full electropolish):
- Better control, uniform quality, easier waste handling
- Field treatment (pickling paste, electrochemical cleaning):
- Essential for large tanks, piping spools, on-site modifications
- Must follow strict PPE, ventilation, and neutralization rules
If you’re designing for aggressive media or marine environments, I never rely on “stainless” alone—surface treatment is part of the corrosion design, not an afterthought.
9. Best Practices for Stainless Steel Surface Treatment
When you invest in stainless, you’re really investing in the surface. If the surface treatment is wrong, you lose corrosion resistance, hygiene, and appearance fast. Here’s how I manage stainless steel surface preparation, quality checks, and maintenance in a way that actually holds up in real-world use.
Stainless steel surface preparation checklist
Before any stainless steel surface treatment (mechanical, chemical, or electrochemical), I always run this basic checklist:
- Remove films and dirt: Dust, cutting fluids, fingerprints, labels, and adhesives.
- Remove markings: Grind or clean off layout ink, crayons, and marker lines.
- Clean weld areas: Strip away splatter, flux, and burned coatings.
- Smooth sharp defects: Knock down deep scratches and burrs that trap dirt.
- Confirm dry, grease-free surface: No oil, no water pockets, no hidden contaminants.
If you’re working with high-finish materials like polished stainless steel sheet or mirror finish stainless steel sheets (for example, architectural panels similar to those in stainless steel mirror sheets), that prep step is non‑negotiable.
Cleaning, degreasing, and marking removal
Good stainless steel surface preparation starts with proper degreasing:
- Degreasing options:
- Alkaline or detergent cleaning in tanks or spray systems
- Solvent wipes (where allowed) for local cleaning
- Steam cleaning for heavy oils and stubborn film
- What to remove:
- Cutting oils, rolling lubricants, tape glue, stickers
- Pen/paint marks, shipping ink, and layout lines
Rule of thumb: if water does not form a uniform sheet on the surface, it’s not clean enough for pickling, passivation, or electropolishing.
Avoiding cross-contamination
“Stainless” stops being stainless the moment you grind it with the wrong tools. To avoid iron contamination:
- Never use:
- Carbon steel wire brushes
- Grinding discs or belts previously used on carbon steel
- Blasting media contaminated with carbon steel
- Always use:
- Stainless-only brushes and tools, clearly labeled
- Dedicated abrasive belts for mechanical polishing stainless steel
- Clean, non-ferrous blast media for abrasive blasting stainless steel
If you mix tooling between carbon steel and stainless, you’ll see rust spots later, even after passivation.
Handling and storage of treated stainless
Once the stainless steel surface treatment is done, treat it like a finished product, not raw stock:
- Store on clean wooden or plastic supports, not bare steel.
- Wrap or film-protect No. 4 finish stainless steel, hairline, and No. 8 mirror finish stainless steel.
- Keep away from:
- Grinding dust
- Wet concrete floors
- Salt-laden air or wash-down spray zones
- Use clean gloves when handling to reduce fingerprint staining.
Protecting finished surfaces
Finished stainless can be damaged fast on site. To protect:
- During construction:
- Keep stainless away from fresh cement, grout, and plaster splashes.
- Don’t cut or grind carbon steel nearby without shielding.
- Against fingerprints & stains:
- Use temporary protective films for mirror polish stainless steel and decorative finishes.
- Wipe fingerprints with mild detergent solution or a stainless-safe cleaner.
- Against chlorides:
- Avoid bleach and harsh chloride cleaners on 304 and 316 surfaces.
- Rinse with fresh water in coastal or pool environments.
Verifying treatment quality
You don’t want to guess if passivation of stainless steel or cleaning worked. Use simple checks.
Simple tests for passivation & contamination
- Water-break test:
- Rinse with clean water and watch the surface.
- A properly cleaned and passivated surface shows a continuous water film.
- Beads or breaks = contamination or oil present.
- Ferroxyl test (for iron contamination):
- Used where iron pickup is suspected, especially after blasting or grinding.
- Blue staining indicates free iron on the surface that must be removed (via pickling stainless steel or proper cleaning).
Visual inspection standards
You don’t need a lab to check finish quality, but you do need consistency:
- No. 4 brushed finish stainless steel:
- Uniform directional grain, no cross-scratches, no deep scoring.
- Hairline / satin finish:
- Long, continuous grain, especially on architectural panels and handrails.
- No. 8 mirror finish stainless steel:
- High gloss, almost image-perfect, minimal distortion, no swirl haze.
- Bead blasted finishes:
- Even matte texture, no “tiger stripes”, no embedded media or rust specks.
Compare against a known reference panel or a sample from your supplier to avoid arguments later.
If you’re sourcing high-end decorative panels, use suppliers that specialize in polished stainless steel sheet products, similar to those seen in industrial-quality premium steel sheet offerings, so you start with consistent stock.
Maintenance of treated stainless steel
Once in service, stainless steel surface finishing techniques only do their job if you maintain them.
Routine cleaning methods
- For brushed and bead blasted finishes:
- Mild detergent + warm water + soft cloth or nylon pad along the grain.
- For mirror polish and electropolished finishes:
- Soft cloth, non-abrasive cleaner, plenty of clean water rinse, then dry.
- For food and pharma surfaces:
- Use approved cleaners; always rinse and dry fully to avoid residue.
Cleaners to avoid
- Chloride-heavy cleaners (bleach, some bathroom and tile products)
- Strong hydrochloric acid or muriatic acid
- Steel wool or carbon steel brushes
- Harsh abrasive powders on polished surfaces
These will attack the passive layer and drive pitting, especially in 304.
Repairing and restoring damaged surfaces
When surfaces are scratched, stained, or lightly corroded:
- Light staining:
- Clean with a stainless-safe cleaner; for tea staining, use a mild acidic cleaner designed for stainless.
- Scratches in brushed finishes:
- Re-grain locally using matching abrasive pads, always along the existing grain.
- Weld discoloration / heat tint:
- Use stainless steel pickling paste or electrochemical cleaning to remove tint and restore corrosion resistance.
- Serious rust or contamination:
- Strip, repickle, and repassivate if necessary, especially on critical equipment.
If you build best practices for stainless steel surface treatment into your process from prep to maintenance, you dramatically extend service life, keep surfaces looking clean, and avoid costly rework later.
10. Stainless Steel Surface Preparation and Design Tips
Design with surface treatment in mind
If you don’t design for finishing from day one, you pay for it later in rework and shorter service life. When you plan stainless steel surface treatment methods in the design stage, keep in mind:
- Access for finishing: Make sure welds, corners, and inside surfaces can be ground, pickled, or electropolished.
- Avoid dirt traps: Tight gaps, overlapping plates, and sharp internal corners are hard to clean and passivate.
- Minimize weld length: Less welding means less heat tint, less grinding, and lower finishing cost.
- Choose the right product form: If you need a consistent brushed façade or panel, start with a factory brushed finish stainless steel sheet such as an LS-series premium brushed stainless steel plate instead of trying to create the grain on-site.
Build finishing into your drawings and you avoid a lot of ugly surprises later.
Specify correct finishes in drawings and POs
Do not leave “finish by supplier” in your documents. Be specific:
- Use standard finish names: “No. 4 brushed finish stainless steel,” “No. 8 mirror polish stainless steel,” “bead blasted,” “2B + passivation,” “pickled and passivated to ASTM A380 / ASTM A967.”
- Define surface roughness (Ra) where hygiene or cleanability matters (e.g. Ra ≤ 0.8 μm for food contact, lower for pharma).
- Indicate sides: “Front: No. 4 finish; Back: 2B, non-exposed.”
- Call out post-weld surface treatment: “All welds to be ground flush and pickled + passivated,” or “critical internal welds to be electropolished.”
Clear specifications reduce arguments, change orders, and corrosion complaints.
Match finish type to function and environment
Every stainless steel surface finishing technique has a “best fit” use case. When choosing:
- Harsh outdoor / marine: Prefer pickled + passivated, or shot / glass bead blasted with proper passivation. Avoid deep scratches that trap chloride.
- Food & beverage / hygiene: Fine mechanical polishing + passivation at minimum; electropolishing stainless steel is ideal where cleanability and low Ra are critical.
- Architectural and decorative:
- Handrails, doors, elevator panels: No. 4 brushed finish stainless steel or long hairline; a product like our premium LS-06 brushed stainless steel plate gives a stable linear grain with good fingerprint control.
- High-impact visual features: No. 8 mirror finish stainless steel or patterned sheets.
- Chemical / process: Focus on corrosion resistance enhancement—pickling stainless steel, passivation, and sometimes coatings on top.
Always ask: What will touch this surface? Water, chlorides, food, solvents, people’s hands, or cleaning chemicals?
Work closely with suppliers and processors
The best stainless steel surface treatment methods guide is useless if the supply chain doesn’t follow it. When you talk with your mill, service center, or fabricator:
- Confirm what “ready-to-finish” means:
- Are the sheets PVC-coated?
- Are there rolling marks or scratches to remove?
- Will they protect the brushed or mirror surface during cutting and bending?
- Align on treatment sequence: Cut → weld → grind → pickle → passivate → electropolish (if needed) → final cleaning and protection.
- Check equipment capability: Can they achieve your specified Ra, No. 4 or No. 8 finish, or do they outsource electropolishing?
Treat your finisher as part of the design team, not a last-minute vendor.
Questions to ask about “surface ready” condition
Before you sign off on a stainless steel job, ask very specific questions:
- What base finish will I receive? 2B, No. 1 (hot rolled), No. 4, bead blasted?
- Will surfaces be degreased and cleaned before passivation or electropolishing?
- How will they avoid carbon steel contamination (separate tools, brushes, and abrasive blasting media)?
- What inspection methods do they use? Any simple passivation or contamination tests (water-break test, ferroxyl test)?
- How will they protect finished surfaces during transport and installation (film, wrapping, edge guards)?
The clearer the answers, the smoother your project runs.
How to avoid rework and surface problems
Most stainless rework comes from the same mistakes: wrong finish, hidden damage, and contamination. To avoid them:
- Decide finishes early and document them everywhere—drawings, specifications, and purchase orders.
- Standardize weld details so finishers can use repeatable grinding and polishing methods.
- Avoid cross-contamination: no carbon steel grinding on the same line, no shared brushes, no mixed blasting media.
- Protect surfaces on-site from cement, grinding sparks, and harsh cleaners—especially chloride-heavy products.
- Require a final visual check against agreed samples (No. 4, No. 8, bead blasted) before handover.
If you’re clear on design, finish, and handling, your stainless will look better, last longer, and cost less over its life.